Duration:
50 Hours - 7 Days
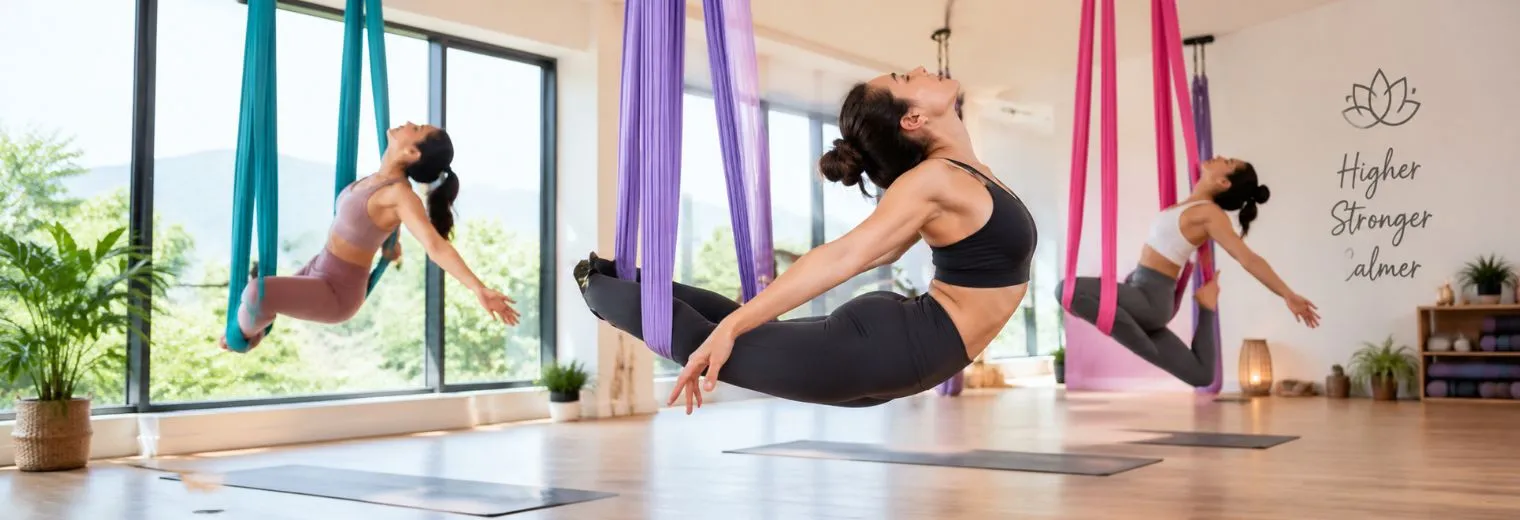
Safe · Creative · Structured
Aerial Yoga Teacher Training Program in Rishikesh, India
Learn aerial yoga techniques, safe hammock practice and teaching methodology in a complete residential training.
Aerial Yoga Teacher Training Course Details
Level:
Beginner to Advance
Location:
Rishikesh, India
Module:
Residential with Meals
Certification:
Aerial YTTC
Yoga Style:
Multi Style
Language:
English & Hindi
Yoga, meditation & therapeutic sound
Aerial Yoga Teacher Training Program in Rishikesh
The 50 Hours Aerial Yoga Certification Course India at Veda Yoga Ashram is a unique opportunity to combine yoga and the support of an aerial hammock. This course is a wonderful option for practicing yoga, aspiring yoga teachers, and people who are simply interested in aerial movement as it boosts your body awareness, flexibility, balance, and even your confidence.
In this course, you will learn the aerial poses, aerial hammocks, and basic yoga alignment, transitions, sequencing, and how to teach. This course is a wonderful opportunity to learn a new yoga style or expand your yoga practice in the serenity and beauty of Rishikesh, India.
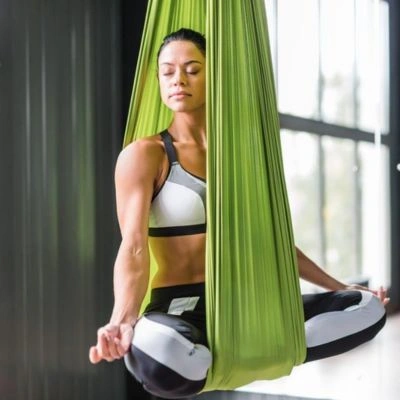
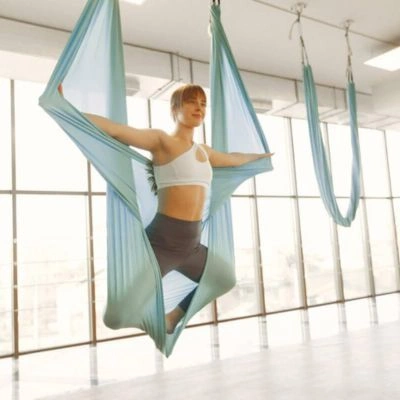
What Is Aerial Yoga?
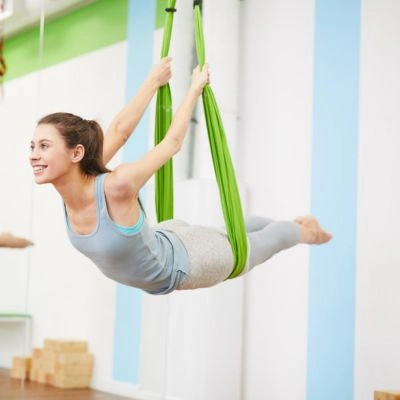
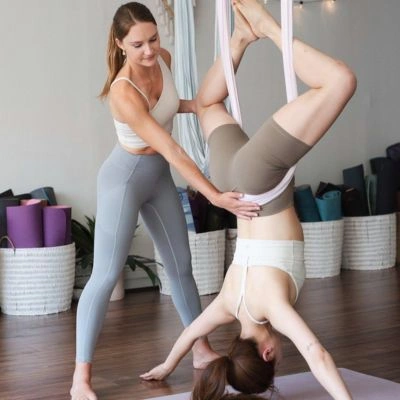
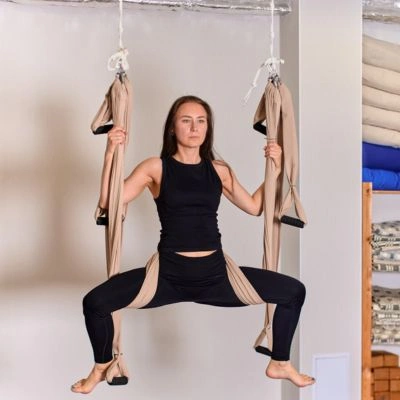
Aerial yoga rishikesh introduces the use of a fabric hammock to support your body in a new dimension. Aerial yoga still lets you keep your feet on the ground, but it gives you the opportunity to explore new stretches, yoga poses, and inversions relative to the ground in a new perspective.
The hammock can act as support while also adding a new dynamic to a given pose. The hammock can make a pose easier to complete while adding a challenge to your strength and coordination. You can use aerial yoga to challenge your body and gain a better sense of how your body is able to move in different ways and in different spaces.
50 hour Aerial YTTC in Rishikesh course that teaches you how to practice aerial yoga and use the hammock. It begins with the basic uses of the hammock and begins to teach aerial yoga poses and beginner yoga sequences. The goal of this training is to create the confidence and knowledge to both practice and teach yoga using the hammock.

Safe · Creative · Supportive
What You'll Learn During the 50 Hour Aerial YTTC?
Aerial Yoga Fundamentals
You will begin with the basics of aerial yoga and learn how to become comfortable working with the hammock. This includes understanding body positioning, basic movements, transitions, and the relationship between your body and the fabric. Building this foundation is important before moving into more challenging sequences. You'll learn to work at a pace that allows you to understand each movement rather than simply trying to achieve a pose.
Hammock Techniques and Safety
Working with an aerial hammock requires awareness and proper technique. You'll learn how to use the hammock responsibly, position your body correctly, and approach movements with control. Safety is an important part of aerial yoga teacher training. You will learn the importance of preparation, movement awareness and how to practice and demonstrate aerial yoga techniques with safety and responsibility.
Aerial Yoga Poses and Sequences
Aerial yoga provides you with an innovative and exciting way to view the practice of yoga, through its support of standing and seated stretches and postures. This module of the training provides you with a variety of aerial poses and the techniques of how to link movements together in order to form a sequence. This training course places more emphasis on developing a high level of body awareness and control. This will be achieved through the progressive practice of aerial yoga.
Alignment and Body Awareness
Good alignment becomes especially important when the body is moving while supported by a hammock. You'll learn to observe posture, balance, weight distribution, and movement patterns as you practice aerial techniques. This awareness can also improve your ability to demonstrate and explain movements to future students.
Aerial Flow
Aerial yoga can be slow and restorative or more dynamic and movement-focused. During the training, you'll explore how individual postures and transitions can be arranged into a smooth practice. You'll develop an understanding of pacing, transitions, and sequencing so that your sessions feel connected rather than like a collection of separate poses.
Teaching Methodology
Learning a pose yourself is different from teaching it to another person. The training therefore introduces the basics of aerial yoga instruction, including demonstrations, verbal cues, sequencing, observation, and clear communication .You will be given chances to explain and guide movements, and because of this, you will learn how to teach aerial yoga with confidence.
The course is built around practical learning, with supporting knowledge that helps you understand why and how aerial movements are performed.
Professional Yoga Education
Aerial Yoga TTC Certification
After successfully completing the Aerial Yoga Teacher Training Program, you will receive an Aerial Yoga TTC certification in recognition of your dedicated practice, learning and course completion.
The 50-hour programme develops practical hammock skills, movement awareness and the confidence to teach aerial yoga safely and responsibly.
Students build a solid understanding of aerial yoga foundations, body positioning, transitions, sequencing and teaching methodology.
Benefits of Structured Yoga Education
- Learn safe hammock setup, movement awareness and aerial yoga techniques.
- Explore alignment, transitions, sequencing and clear verbal cues.
- Develop confidence to demonstrate and guide movements responsibly.
- Train with practical support in a structured learning environment.
Course Certificate Eligibility Requirements
Students receive the completion certificate after regular attendance, active participation and successful completion of the course requirements.

Practical · Creative · Supportive
Why Choose Veda Yoga Ashram for Aerial Yoga Training?
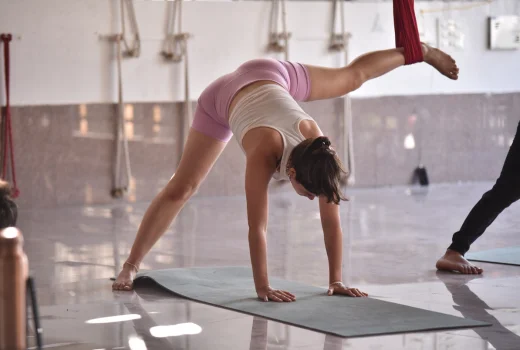
A 50 Hours Aerial Yoga Certification Course India can be a great option for you, especially if you already have a background in yoga and you want to have the aerial aspect added to your skill set. Normally, you would have to spend several weeks studying many different styles of yoga. However, in this course, you will be able to focus on aerial yoga, the hammock-based practices, and the techniques used in the art of teaching aerial yoga.
The 50 Hour Aerial Yoga Teacher Training in Rishikesh is designed to help you develop your yoga practice, and is especially designed to help you understand how aerial yoga can be incorporated into yoga practice in a variety of different ways. You will also get to know the aerial yoga equipment, explore a variety of different aerial yoga techniques, learn about the different alignments in aerial yoga, and teach aerial yoga poses and techniques to your classmates. For regular yoga instructors, integrating aerial yoga can help you add more variety to the yoga classes and workshops that you teach. For yoga practitioners, it can help you learn to view yoga from a different perspective in addition to the aerial aspect. For beginners, who meet the prerequisite requirements, it can be a great option to help you learn yoga and aerial movement.
Know MoreBenefits of Aerial Yoga TTC In Rishikesh, India
Aerial yoga rishikesh offers a different way to experience movement and can complement a regular yoga practice. With consistent and appropriate practice, some of the commonly experienced benefits include:
Improved flexibility
The hammock can provide support during certain stretches, allowing you to explore movement gradually and with greater awareness.
Balance and Coordination
Aerial yoga improves your ability to recognize where your body is in relation to the world around it while also improving your balance and coordination.
Full body
Aerial yoga forces you to engage all of your stabilizing and supporting muscles, because of this, a majority of aerial yoga is a full body practice.
Body Awareness
Aerial yoga offers a unique way to practice being conscious and aware of the alignment of your body and presents a fun and creative way to breathe.
A fresh approach to yoga
Aerial practice introduces new variations of familiar movements and can bring creativity and variety to your regular routine.
Relaxation and mindfulness
Slow gentle movements supported by the hammock and yoga apparatus helps participants to better control their breath.
Increased confidence
As participants are encouraged to always progressively learn new movements, confidence to use balance and suspension as well as take on unaccustomed postures grows.
Who Can Join the 50 Hour Aerial YTTC?
The 50 Hour Aerial Yoga Teacher Training in Rishikesh is a great opportunity for an individual looking for a program that is more specific and centered compared to a long training that involves different styles of yoga.
This includes:
- Yoga teachers wants to expand their skills and teaching with aerial yoga
- Regular yoga practitioners wanting to learn a different practice
- Wellness practitioners wanting to learn and understand aerial movement
- Individuals wanting to learn the skills of aerial yoga
- People who like the creative side of yoga and movement
There can be a range of different requirements such as the level of fitness, prior experience with yoga, etc. based on the course. It is wise to contact the institution if you are interested in aerial yoga, have prior injuries, or other health concerns that may affect your ability to do aerial yoga.
Course timetable
Daily Schedule for Aerial Yoga Teacher Training
Wake up time
Shatkriyas (Jal Neti/ Eyes Cleansing)
Hatha Flow and Pranayama
Breakfast
Free and Relax
Yoga Philosophy
Yoga Anatomy
Lunch
Self-study
Rest / Light Stretch / Relax and later change to how to design class
Vinyasa Yoga and Adjustment
Adjustment & Alignment
Meditation
Dinner
Self-study
Lights Off
Note:
Schedules are subject to change.
No Classes on Sunday
Plan your residential training
Aerial Yoga Teacher Training Upcoming Dates 2026-2027
Course Date
Course Fee
Availability
Booking
Note:4-sharing rooms are gender-segregated.
We dont provide extra stay beyond course dates
Additional charges apply for air conditioning or room heaters, available only in 4-sharing rooms.
Life at Veda Yoga Ashram
Food & Accommodation
Nourishing meals and a peaceful place to rest support every part of your yoga journey.
01
Food & Sattvic Dining
Sattvic Food: It's Significance
At the Veda Yoga Ashram we see that the true Yoga is beyond the mat. The right kind of food is as important as the physical practice itself, and our program is a holistic approach to wellbeing, starting with the food.
We offer freshly prepared sattvic foods, based on ancient ayurvedic teachings that food directly affects the mind, body and spirit. Sattvic diet revolves around the use of pure, natural and wholesome food items without any fried, processed, canned and artificially preserved food items. This type of nutrition is beneficial for the heart and blood vessels, helps normalize cholesterol, and provides a healthy digestive process and assimilation of nutrients. A sattvic diet has also been linked over the years to a decrease in the incidence of diabetes and lifestyle diseases, making it an ideal partner to a deep yoga and meditation practice.
Each of our meals is carefully prepared and planned and is as nutritious as it is delicious.
What we offer:
- Two freshly delicious and healthy vegetarian meals per day
- Vegan and gluten-free meals available upon request
- Drinking water is safe and clean, available at all times.
- Fresh seasonal fruits all day:
- Ayurvedic tea corner with restorative herbal teas.










02
Comfortable Accommodation
Accommodation : Veda Yoga Ashram - A ‘Home away from home’
A quiet and clean environment is a key component to any worthwhile yoga practice. The rooms at Veda Yoga Ashram are well planned to promote comfort, rest and overall wellness for yoga students and retreaters.
Our clean, cosy and well maintained rooms are set among a peaceful and natural setting, offering a quiet retreat to unwind after each yoga practice, meditation and study day. A good night's sleep is not a luxury, it's a requirement during an intensive Yoga Teacher Training Course. Rest and a stable home base are essential to healing, thinking clearly and managing your emotions, and are important factors in the best use of your time.
The lifestyle at Veda Yoga Ashram is based on the yogic concepts of simple living, mindful awareness and yogic discipline. Our sattvic food, the proper daily routine and the serene atmosphere provide students with a place where they can experience a yogic lifestyle not only in class but beyond and all day long.
Our Room facilities include:
- The choice of both Private and Twin sharing rooms with attached 24/7 hot water facilities.
- Clean and comfortable sleeping areas with good quality mattresses and curtains for sleep
- Fresh and clean bed linens changed every week.
- Personal Room Lock and Key to ensure personal safety and privacy
Course At A Glance
About the Training

Class Size
Small, supportive groups
Yoga Style
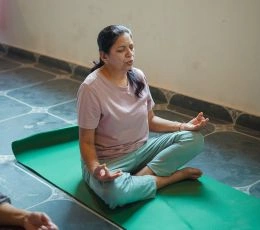
Multi Style Aerial Yoga
Class Duration
50 Hours · 7 Days

Food
Nutritious vegetarian yogic meals
Skill Level
Beginner to Advance
Certification
Aerial Yoga TTC certificate
Location
Rishikesh, India
Join Training
Enroll nowPractical · Safe · Supportive
What Will You Learn in Aerial Yoga Teacher Training?
The Aerial Yoga Teacher Training Program at Veda Yoga Ashram offers in-depth learning of aerial yoga techniques using the hammock as a supportive prop. You will understand correct body alignment, safe transitions, and the biomechanics behind aerial postures, helping you practice and teach with confidence.
In addition to physical techniques, you will learn class sequencing, creative flow building, and effective teaching methodology for aerial yoga sessions. The training also covers injury prevention, modifications, and proper cueing, enabling you to guide students of different fitness levels.
Yoga Philosophy and Hatha Yoga
Learn the origins and history of yoga, the eight limbs of yoga, traditional Hatha Yoga postures, correct alignment and their therapeutic benefits.
Teaching Methodology
Understand effective teaching techniques, class management, and how to adapt lessons to different student needs and abilities.
Practice and Application
Engage in hands-on yoga practice, including asanas, pranayama, meditation, aerial yoga practice and teaching practicums to develop confidence and mastery.
Before you apply
Aerial Yoga Teacher Training Frequently Asked Questions
The training is suitable for practitioners who want to learn aerial yoga in a safe, structured and supportive environment.
You will learn hammock setup, posture alignment, inversions, safe transitions, class sequencing, cueing techniques and injury prevention.
No. The program offers step-by-step instruction and adapts the learning process to different experience levels.
Students who successfully complete the course requirements receive an Aerial Yoga Teacher Training certification from Veda Yoga Ashram.
Rishikesh is a destination known for yoga and spiritual leanings that are sought out by thousands for practicing and studying. With the peace and calm that surrounds this location, you experience the traditional teachings of yoga with advanced teachers.
Absolutely. Veda Yoga Ashram welcomes students from India and around the world into its multicultural learning environment.
One small step make a difference
Important Notes from Veda Yoga Ashram
Student Guidelines at Veda Yoga Ashram
To preserve a peaceful, disciplined, and authentic yogic atmosphere, all participants of Yoga Teacher Training Courses in Rishikesh at Veda Yoga Ashram are expected to follow these essential guidelines:
- Complete attendance is required for all scheduled classes, practical sessions, and program activities.
- Punctuality is highly valued; students are expected to arrive on time, as late entry may not be permitted.
- The ashram maintains a strict no-smoking, no-alcohol, and no-intoxicants policy within the premises.
- Students are requested to maintain respectful behavior toward teachers, staff members, and fellow practitioners at all times.
- If you plan to observe a fast, kindly inform the kitchen team in advance to help prevent food wastage.
- Any books, study materials, or items borrowed from the ashram must be returned before departure.
- Accommodation is reserved exclusively for enrolled students; friends or family members are not permitted to stay on campus.
Compliance With Yoga Alliance Standards
As a recognized yoga school in Rishikesh, Veda Yoga Ashram operates in full alignment with Yoga Alliance guidelines, maintaining a secure, ethical, and respectful learning environment for all students enrolled in our Yoga Teacher Training Courses in Rishikesh.
- Anti-Retaliation Policy: Students who report concerns or participate in related investigations are fully protected from any form of retaliation.
- Anti-Harassment Policy: We uphold a zero-tolerance approach toward harassment of any kind, including physical, verbal, sexual, discriminatory, or online misconduct, ensuring a safe space for every student.
- Attendance Policy: Active participation and full attendance in all scheduled classes, practical sessions, and program activities are mandatory throughout the Yoga TTC.
Refund Policy at Veda Yoga Ashram
- The advance deposit paid to confirm enrollment is non-refundable under any circumstances.
- In case of an unforeseen emergency, students may transfer the deposited amount to another course offered by Veda Yoga Ashram within 12 months from the original course start date.
- Course cancellations do not carry any additional charges; however, students must inform the ashram via email prior to the course commencement.
- While deposits are not eligible for refunds, they remain valid for future course participation within the permitted time period.
Women’s Safety at Veda Yoga Ashram
- At Veda Yoga Ashram in Rishikesh, the safety and comfort of women students is a top priority. We are committed to maintaining a secure, respectful, and supportive environment where women can focus fully on their Yoga Teacher Training Course in Rishikesh without concern or distraction.
- Our ashram follows strict safety protocols to ensure a peaceful stay for all women practitioners. The campus is monitored by 24/7 security personnel, ensuring continuous supervision and immediate assistance whenever required. These measures help create a safe atmosphere throughout the day and night.
- CCTV Surveillance: To further enhance security, CCTV surveillance is installed across key areas of the ashram. All accommodation rooms are provided with individual locks and keys, allowing women students to enjoy privacy, independence, and complete peace of mind during their stay.
- Our accommodations offer individual rooms, each equipped with its own private lock and key, allowing you to enjoy your stay with complete peace of mind.
Course Essentials
50 Hour Aerial Yoga TTC: Included & Excluded
What Does the Course Fee Include?
- Private and shared accommodation throughout program duration
- Three daily sattvic vegetarian meals and herbal tea
- Yoga props and study materials
- Local excursions and rejuvenating activities
- 50 Hour Aerial Yoga Teacher Training certification upon successful completion
What Is Not Included in the Course Fees?
- Travel expenses
- Laundry, phone and other personal expenses
- Optional activities outside the program
- Accommodation beyond the course duration
Activity During The Course
Outdoor Activities & Excursions - Retreat & YTTC In Rishikesh
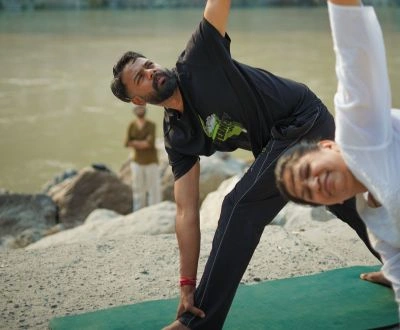
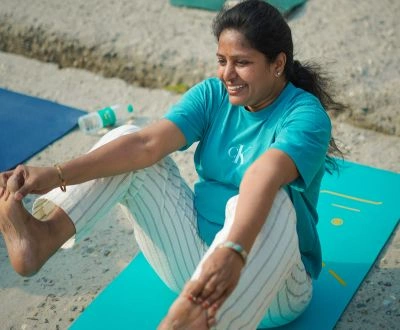
Rishikesh, known as the Yoga Capital of the World, offers a unique spiritual atmosphere that deeply supports yogic learning and self-reflection. During your Yoga Retreat or 100 Hour Yoga Teacher Training Course in Rishikesh, you will have the opportunity to participate in enriching activities that complement your training and deepen your overall experience. These activities include:
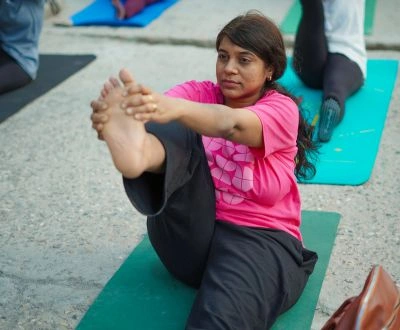
Note:Outdoor activities such as sunrise treks and Ganga Aarti are subject to weather conditions and local transportation availability. Activity schedules are finalized on a weekly basis to ensure safety and the best experience.As part of the Yoga Teacher Training Program in Rishikesh, excursion activities are usually planned on Tuesday of the 2nd week. Additional excursions are typically arranged on Tuesday of the 3rd week, depending on conditions.
Our Expert Team of Teachers
Best Yoga Teachers in Rishikesh, India
ॐ
Learning at Veda Yoga Ashram takes place exclusively under the tutelage of some of the most experienced yoga teachers from Rishikesh, India. Our teachers are well experienced in the yogic practices and teaching methods to provide every student with genuine yogic knowledge and guidance. All teachers have a master's degree in Yogic Science and are certified by Yoga Alliance, which includes academic knowledge and a wealth of experience in teaching. Our graduates benefit from this solid base to build their confidence, clarity and to learn how to teach yoga professionally.

Founder
Yogesh Dixit
Experience
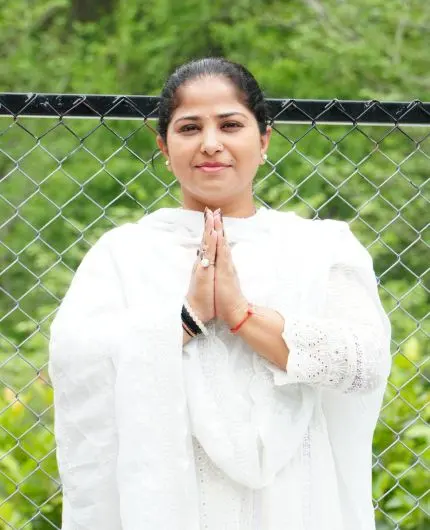
Co-Founder
Neha Thakur
Experience
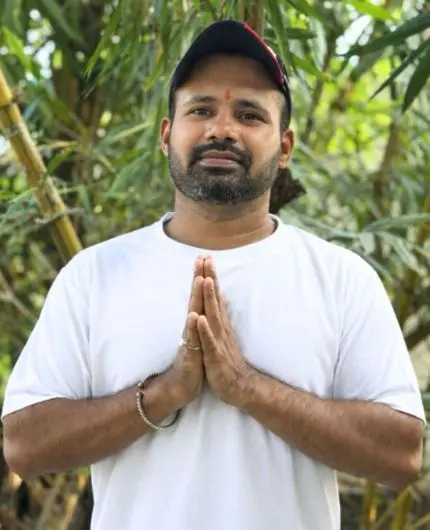
Hatha & Vinyasa Yoga Teacher
Rahul Ji
Experience

Manager
Yathin Ji
Experience
Reserve with confidence
How to Book Your Seat
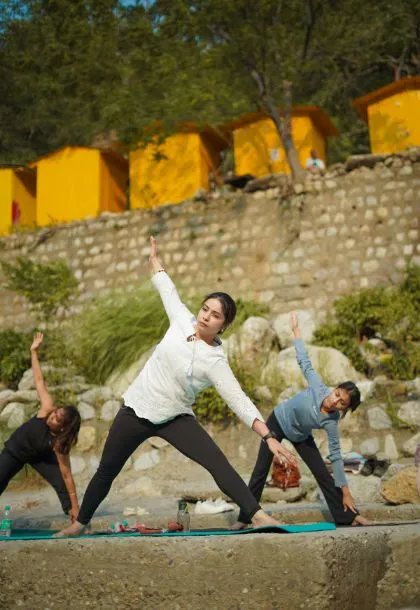
Booking your 50 Hour Aerial Yoga Teacher Training Course is simple and guided. Share your preferred date and accommodation choice, and our team will help you complete every step clearly.
After availability is confirmed, you will receive the information needed to reserve your seat and prepare for your arrival.
Apply online
Send your preferred course date and contact details.
Receive confirmation
Our team checks availability and shares next steps.
Pay booking deposit
Make the confirmed advance payment to reserve your place.
Prepare for arrival
Receive check-in and travel information before arrival.
Note: Contact the Veda Yoga Ashram team for booking, cancellation or refund clarification before making payment.
Your teaching journey begins here
Begin Your Journey with Veda Yoga Ashram
Sound healing and yoga can help provide a way to understand the self more deeply and can help promote personal and professional development. Veda Yoga Ashram offers a 200 hour course that uses sound healing and yoga to teach practical skills that will allow the student to teach and also enrich their lives.
Transformative Journeys at Veda Yoga Ashram
Testimonials/Reviews - What Do Students Say About Us?
This was a wonderful yoga retreat In Rishikesh. Veda yoga ashram provides excellent itinerary arrangements, including morning Ganga yoga, cave meditation, Ganga Aarti and sunrise sessions. Veda yoga ashram take great care of everyone, teachers are knowledgeable and nice. This was a very spiritual yoga journey, everyone was very happy, cannot wait for next Rishikesh trip.
J
My time at Veda Yoga Ashram was memorable to say the least. It’s not just a retreat but an amazing yoga school, and the entire experience felt beautifully balanced between learning, spiritual practices, and meaningful excursions. Meditating at Vashishta Cave and attending the evening Ganga Aarti on the banks of the Ganga were truly special moments that stay with you long after the retreat ends. These experiences make you feel deeply connected to the spiritual essence of Rishikesh. Mr. Yogesh and Ms. Neha are wonderful hosts who create a warm and welcoming atmosphere for everyone. The teachers are excellent, the food is nourishing, and the overall experience feels very holistic. I also met some amazing people and made great friends along the way. If you’re looking for a place to slow down, learn authentic yoga, and truly experience the spiritual side of Rishikesh, Veda Yoga Ashram is a fantastic choice.
N
I recently completed my Prenatal and Postnatal YTTC and it was a wonderful learning experience. The course was well-structured with lots of valuable content and deep knowledge.Prenatal and postnatal yoga is very deep, and this course helped me truly understand it better. A big thank you to Neha ma’am for the clear and detailed theory classes, and Himani ma’am for the practical sessions which were very helpful and easy to understand. Grateful for this beautiful journey and highly recommend this course!!!
S
I recently completed a Prenatal and Postnatal Yoga course, and I feel truly grateful to have learned from such an incredible teacher Neha ma’am . The entire experience was not only educational but also deeply enriching on a personal level. I recommend everyone to do this course, even if you don’t want to teach. This course had the knowledge of pre-pregnancy and Post pregnancy at such a deep level that everybody must know about it.
G
My overall experiance was excellent . If i have to discribe in one word " its a re engeneering of our body n soul" the team was very supportive , specially Ms Neha maam , Deepa maam , Rahul Sir , Yogesh sir n Aman . The entire Hotel staff of Nature Nest were very helpfull n the hospitality as Awsome. Will definately recommend all my friends and family to "Veda Yoga Aashram "
H
I have successfully completed the Master's Sound Healing Course at Veda Yoga Ashram with Neha Ma'am, and I am truly grateful that I made this decision. It has been a beautiful and transformative journey filled with learning, healing, and self-discovery. I am from Gujarat, where the competition in this field is very high. However, this course has given me the confidence, knowledge, and practical skills to move forward with clarity and purpose. I am taking back not only a certification but also unforgettable memories, meaningful experiences, and the blessings of my teachers. Thank you, Neha Ma'am, and the entire Veda Yoga Ashram family, for your guidance, support, and warmth throughout this journey. I will always cherish this experience.
F
I am deeply grateful to Veda Yogashram for such a beautiful and life-changing experience. I completed my Prenatal Yoga Teacher Training Course and Yoga Retreat here, and every moment was filled with learning, peace, and positivity. A heartfelt thank you to Neha Ma’am, Rahul Sir, Yogesh Sir, and Deepali Patil Ma’am. They are not only exceptional teachers but also wonderful human beings. Their patience, guidance, and encouragement made this journey truly special. I became so attached to them that saying goodbye was very emotional. They will always have a special place in my heart. The staff is incredibly kind and supportive, the atmosphere is peaceful, and the entire ashram feels like a second home. I learned so much here, not only about yoga but also about myself. Thank you, Veda Yogashram, for the unforgettable memories and valuable teachings. I will definitely come back again and highly recommend this ashram to anyone looking for an authentic and meaningful yoga experience.
R
My experience at Veda Yoga Ashram was absolutely wonderful. I attended a sound-healing session with Neha ma'am, and it turned out to be one of the most peaceful and uplifting experiences I’ve had. The vibrations of the instruments created such a powerful yet gentle energy that helped release stress and bring a deep sense of calm. Also, Neha ma’am carries herself with genuine kindness and professionalism, her guidance throughout the session made the experience even more meaningful. The whole session felt magical and refreshing for the mind and body. I would definitely recommend this experience to anyone looking for relaxation, healing, and inner peace in Rishikesh.
N
Veda is a wonderful yoga retreat in Rishikesh with a peaceful atmosphere and authentic yogic lifestyle. It’s not just about yoga sessions or excursions—it’s about truly experiencing the ancient yogic tradition and spirituality that Rishikesh is known for.The hospitality of Mr. Yogesh and Ms. Neha is exceptional. Highly recommended for anyone looking for a genuine yoga and meditation retreat in Rishikesh. ⭐
K
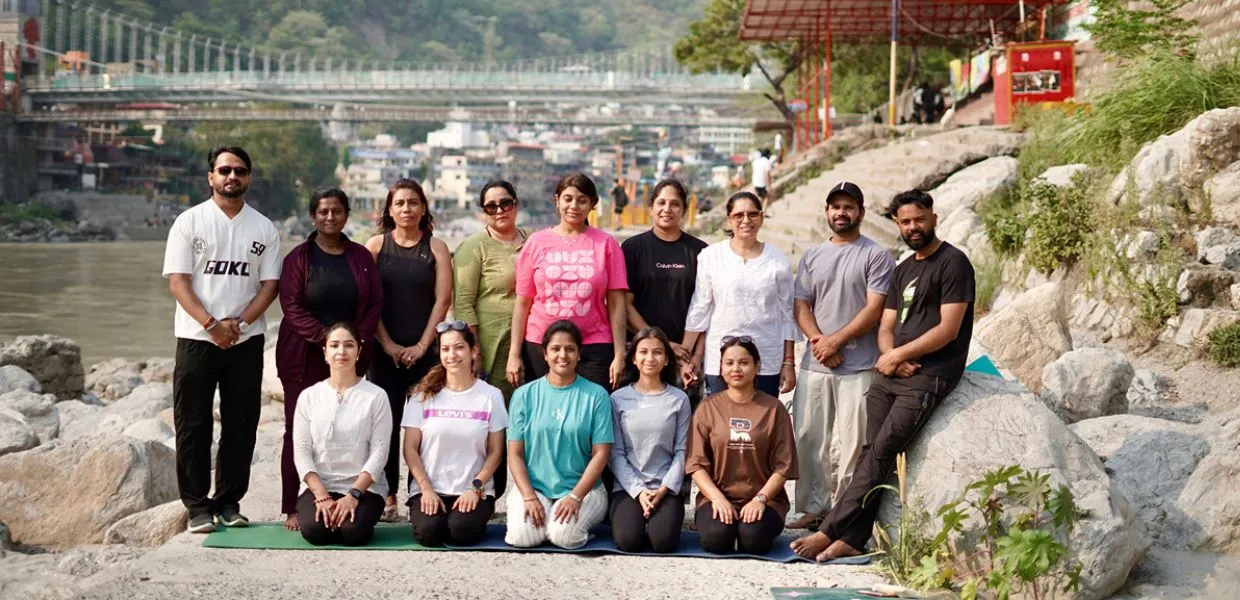
Yoga Community of Veda Yoga Ashram Rishikesh
Our Yoga Community


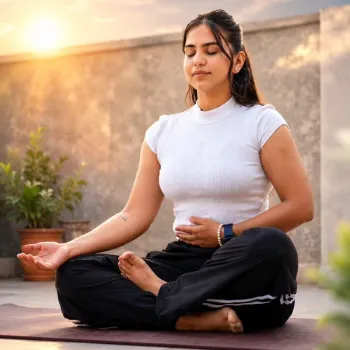
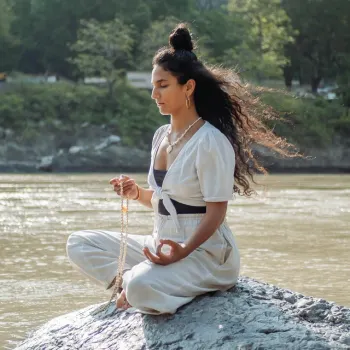

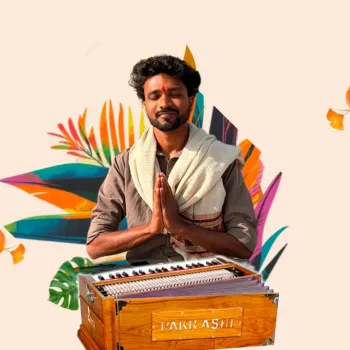



Veda Yoga Ashram Gallery

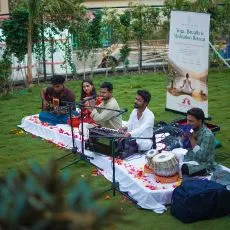
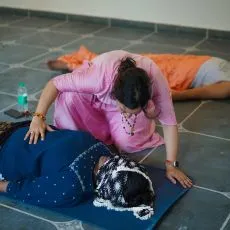
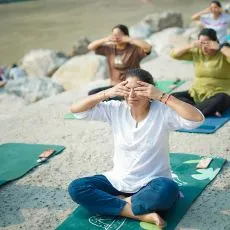
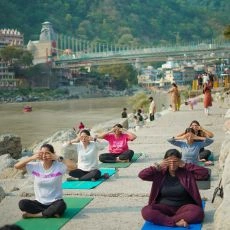
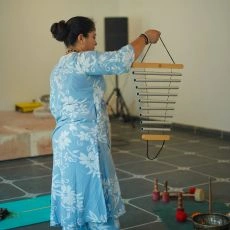
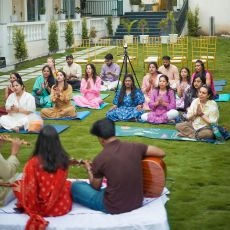
Yoga knowledge
Latest from our blog
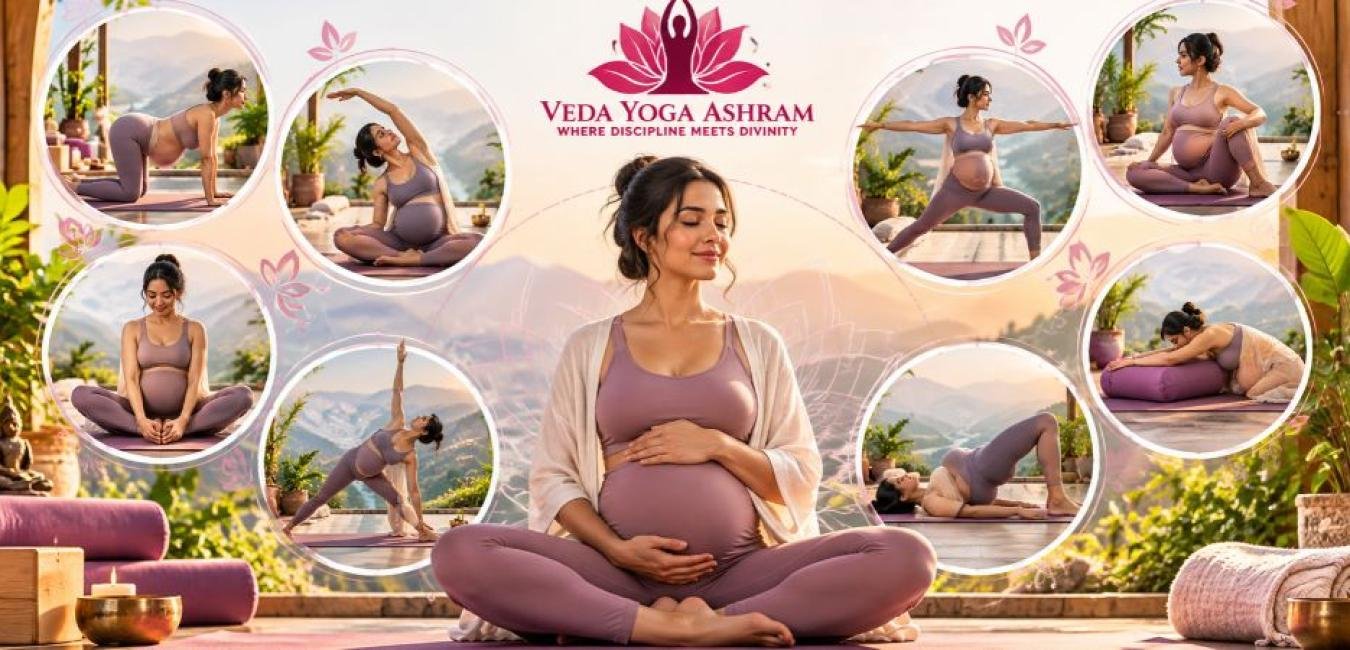
Yoga & Wellness
10 Safe Prenatal Yoga Poses for Beginners During Pregnancy
Pregnancy causes physical and emotional changes. As the body gets ready for a growing baby moving can be a part of staying comfortable moving easily being strong and feeling relaxed. For healthy pregnancies yoga that is changed to fit the situation can be part of a regular activity plan. Pregnancy is not the time to push for more flexibility or try advanced positions. Your balance, how your joints move, how energy you have and how you feel can change each week. The best way is to make sure the movements are gentle under control and match where you are in your pregnancy. The pregnancy yoga poses in this guide are meant as examples for people who are just starting out not as a replacement for medical advice. If you are pregnant talk to your healthcare provider before starting or changing your exercise routine especially if your pregnancy is risk or you have a health problem. The NCCIH says that yoga can be safe and helpful, during pregnancy if the right steps are taken. Why Choose Prenatal Yoga During Pregnancy? Prenatal yoga is adapted to the changing needs of pregnancy. Than focusing on achieving difficult shapes prenatal yoga emphasizes comfortable movement, breath awareness, relaxation, mobility and appropriate strength work. Research reviewed by NCCIH suggests that prenatal yoga may help reduce perceived stress, anxiety and depression during pregnancy although evidence for outcomes remains limited and researchers continue to study the practice. A pregnancy-focused class may also help beginners understand how to modify postures as the abdomen grows and balance changes. The important principle is simple: prenatal yoga should feel supportive rather, than Exhausting. Yoga Asanas During Pregnancy 1st Trimester: What to Know The first trimester can cause tiredness feeling sore breasts and changes in energy. You might feel completely different from one day to the next. There is no need to start a routine just because you are pregnant. If your doctor says it is okay to exercise gentle movement can be adjusted depending on how you feel. 1. Cat-Cow. Marjaryasana-Bitilasana Start on your hands and knees with your hands under your shoulders and your knees under your hips. As you breathe in gently stretch your spine. Open your chest. As you breathe out curve your spine a little. Let your neck relax. Move slowly. Stay within a comfortable range. This is a mobility exercise because you can easily make the movement smaller when you have less energy. 2. Supported Bound Angle Pose. Baddha Konasana Sit comfortably with the soles of your feet together. Your knees pointing outward. Put cushions or folded blankets under your thighs if your hips feel tight. Keep your spine relaxed and straight. There is no need to push your knees down. This seated position can be used as a movement and relaxation practice especially when you don’t want a hard session. Yoga Poses During Pregnancy: Second Trimester Practice As pregnancy continues, the belly. The body’s balance changes. Balance can become harder to manage which is why steady standing positions and helpful tools can become more useful. 3. Warrior II. Virabhadrasana II Stand with your feet a little apart. Turn one foot out. Bend the knee only as far as feels right while keeping the knee in line with the foot. Stretch your arms out in directions and breathe steadily. Use a wall or chair for support whenever you need it. Warrior II can offer a controlled lower-body strength challenge without needing flexibility. 4. Goddess Pose. Utkata Konasana Stand with your feet wider than your hips and turn your toes out. Bend your knees gently and lower your body only as far as you can manage comfortably. Keep your body straight and use a wall or strong support if your balance feels unsure. Don’t stay in the squat long if your legs get tired. 5. Supported Triangle Pose. Trikonasana Take a stance and turn one foot out. Stretch your arms. Reach gently toward the front leg. Of reaching all the way down put your hand on a yoga block or something similar. Keep your torso long. Avoid pressing on your stomach. As pregnancy continues, making your feet further apart and using support can make the pose more comfortable. Prenatal Yoga Poses for the Third Trimester During the trimester the growing belly can affect balance and movement a lot. The goal of the practice might change to movement, comfortable strength, breathing and relaxing. 6. Supported Childs Pose. Balasana Get on your knees and spread your knees enough to make space for your belly. Put a bolster or a few folded blankets in front of you. Let your upper body rest on the support instead of pushing your torso down. If this position does not feel good choose another resting position. The modified version is more important than trying to make the shape exactly. 7. Legged Standing Side Stretch Stand with your feet a comfortable distance apart and hold onto a wall or chair with one hand. Lift the arm and gently stretch the side of your body. Do the same on the side. This simple standing move can be easier to control than a twist and can be changed as your balance changes. 8. Supported Malasana. Garland Squat Stand with your feet a little wider than your hips and slowly lower into a squat. Use a yoga block, bolster, wall or strong support so you don’t have to balance without help. Don’t force your knees out. Go deeper just to get the traditional pose. Because pregnancy affects balance and movement differently for each person the depth should be based on how you feel, not a goal. 9. Side-Lying Relaxation Pose Lie on your side with your head supported by a pillow. Put another pillow between your knees. Add more support under your belly if needed. Let your shoulders jaw and hands relax while breathing normally. This can be very helpful as a rest position later in pregnancy. NCCIH suggests changing yoga during pregnancy. Specifically says that lying on your back for too long should be avoided. 10. Pelvic Tilts on Hands and Knees Get on your hands and knees with your spine, in a neutral position. Gently move your pelvis to create an amount of spine movement without making it too big. Keep the movement slow. Match it with your breathing. If your wrists feel uncomfortable put a folded towel or yoga wedge under your hands. Ask a trained teacher for another option. Pregnancy Yoga Chart: A Simple Trimester Guide Stage Main Focus Examples First Trimester Gentle mobility and relaxation Cat-Cow, Supported Bound Angle Second Trimester Balance, strength and mobility Warrior II, Goddess, Supported Triangle Third Trimester Comfort, support and relaxation Supported Child's Pose, Side-Lying Relaxation, Supported Squat his chart is a general guide rather than a prescription. Your healthcare provider or qualified prenatal yoga instructor may recommend different movements depending on your health and pregnancy. First Trimester Yoga Poses: What Should Beginners Remember? During pregnancy many new mothers think they must start exercising or become more flexible right away. That is not necessary. If you were doing yoga before getting pregnant you might be able to keep up with a version of your routine but talk to your healthcare provider first. If you have never tried yoga begin with movements instead of complicated poses. The first trimester is about noticing how your body feels. On days when you feel very tired or sick a short session of stretches breathing exercises or quiet relaxation can help more, than trying to do a full yoga class. What to Avoid When Practicing Yoga During Pregnancy Safety is always more important than getting into a certain pose. According to NCCIH, pregnant yogis should steer clear of hot yoga due to the potential for overheating and also modify exercises which require long periods of lying down on the back. It also suggests consulting a healthcare professional and yoga instructor about personal requirements. You might also want to consider avoiding/ modifying: Deep abdominal compression Extremes in twisting Advanced Inversions Breathing techniques that are forceful Aggressive stretching Balance poses that do not have support Any position that causes pain or discomfort Do not make comparisons between your pregnancy yoga routine and pictures of advanced practitioners on the internet. : Essential Safety Tips A comfortable practice environment is as important as the poses themselves. Use a nonslip surface. Keep a wall, chair, blocks or bolsters close by. Stay hydrated. Avoid exercising in too much heat. Your instructor should know that you are pregnant and should understand how to modify the practice for people. NCCIH recommends that pregnant people discuss their needs with both their healthcare provider and yoga instructor because modifications may be necessary. Stop exercising and seek advice if you experience concerning symptoms such, as vaginal bleeding, fluid leakage, chest pain, faintness, severe breathing difficulty, painful contractions or other symptoms your healthcare provider has told you to seek attention. How Often Should You Practice? There is no need to measure your pregnancy journey by the number of poses you complete. You might practice for 15 to 30 minutes on a day when your energy's good while another day may call for a shorter session. For pregnancies regular physical activity is generally encouraged when medically appropriate. NCCIH notes that physical activity can be safe and beneficial during pregnancy while emphasizing the importance of precautions. Consistency, comfort and listening to your body are more important, than intensity. Why Learn Prenatal Yoga From a Qualified Teacher? Pregnancy yoga needs more than swapping a few poses for simpler ones. A qualified prenatal instructor must know about trimester‑specific details how to modify poses when to use props, breathing methods and when to send a student to a doctor. Veda Yoga Ashram that covers postnatal poses, trimester‑specific precautions and contraindications the anatomy of pregnancy breathing techniques, meditation, relaxation methods pose modifications and teaching methods. Common Mistakes Beginners Should Avoid Trying to Stretch Deeper Pregnancy is not a flexibility competition. Stop before discomfort. Ignoring Balance Changes A pose that felt stable weeks ago may feel different now. Use support. Holding the Breath Breathing should remain comfortable and natural unless practicing a breathing technique under expert guidance. Practicing Through Pain Pregnancy involves unfamiliar sensations but pain should not be ignored. Following a Generic Online Routine Without Modification A routine designed for a -pregnant practitioner may not account for trimester-specific changes. Final Thoughts A thoughtful prenatal yoga practice is less about achieving perfect shapes and more about moving with awareness as your body changes. The ten movements in this guide provide examples of gentle practices that may be adapted for different stages of pregnancy, but no generic pregnancy yoga poses list can replace individual medical advice. Start slowly, use props, stay within a comfortable range, and select a qualified prenatal yoga instructor whenever possible. As your pregnancy progresses, your practice may need to change—and that is completely normal. The goal is not to maintain the same yoga practice you had before pregnancy. The goal is to create a practice that respects where your body is today.
Read article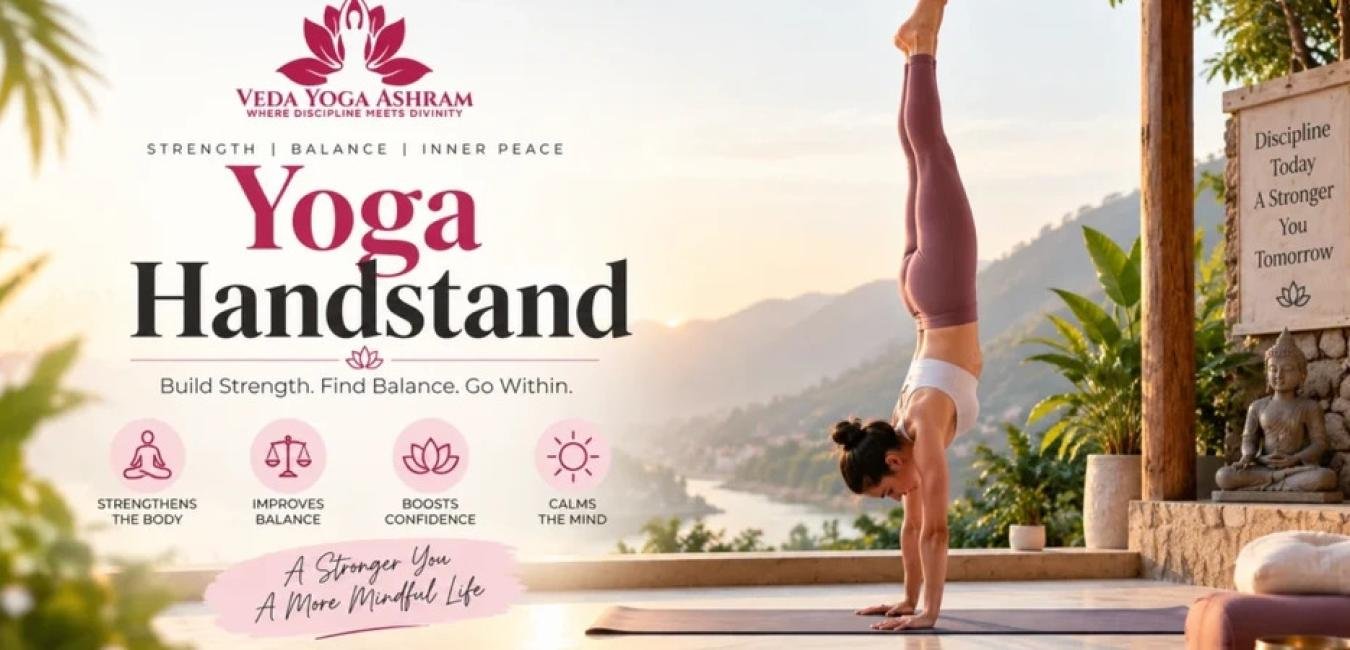
Yoga & Wellness
Yoga Handstand: A Complete Beginner’s Guide to Balance and Strength
I find that a yoga handstand can seem scary when you first see someone balance down with ease. A handstand needs strength, coordination, body awareness, mobility and patience. Initially, the hardest part is not just lifting your feet off the floor. Learning to control the body when the hands are the base. A handstand is an inversion where the hands hold the body and the legs stretch up. A handstand needs shoulders, a tight core solid wrists and hands, and enough confidence to face the fear of falling. You do not have to master the handstand right away. Moving through preparation exercises and supported handstand variations is safer and more practical for building the needed skills. This guide shows how to prepare for a handstand, how to practice it step-by-step, mistakes, beginner progressions and key safety points. What is a Yoga Handstand? A yoga handstand is an inversion in which the body is balanced vertically on the hands, with the arms supporting the body and the legs extending above the hips. In some yoga traditions, handstand practice may be described as an arm balance or an inversion practice. The position demands coordinated work from the wrists, forearms, shoulders, chest, core, hips and legs. Unlike kicking the legs upward a controlled handstand depends on creating a stable line and making small adjustments through the fingers, hands, shoulders and core. Because it places load through the upper body and requires balance while inverted, beginners should build strength and technique progressively. ACE Fitness recommends developing confidence in inversions, such as the downward-facing dog, before progressing toward handstand preparation. Physical Requirements for a Handstand Before you try a freestanding handstand, it helps to understand the physical qualities you need. Wrist and Hand Strength Your hands and wrists are the foundation, so they must be able to support your weight. Start with wrist movements and exercises that are supported. Put your palms on the floor, spread your fingers, press through your fingertips, and make sure your weight is evenly spread across your hands. Never force a wrist position that hurts. If pain keeps coming, it is a sign to stop and get professional help. Shoulder Strength and Mobility Your shoulders need stability and enough overhead mobility. Exercises like the plank, downward‑facing dog, dolphin pose, and controlled shoulder‑strengthening moves can build the base you need for advanced inversions. ACE Fitness points out that Downward‑Facing Dog can help strengthen the arms required for inversion work. Core Control A strong active core keeps your body aligned when your legs are overhead. Work on plank variations hollow‑body drills and controlled leg lifts to learn how to stabilize the trunk. Leg and Hip Control Your legs do not stay still during a handstand. Active thighs, engaged glutes and controlled hips help you keep a body position. Mobility, in the hamstrings can also make some preparation drills easier. Flexibility alone will not make a handstand work. Warm-Up Before Practicing One of the lessons from beginner handstand training is that preparation should come before repeated kick-ups. The competitor material also emphasizes warming the wrists, shoulders, core, quadriceps and hamstrings before attempting the skill. Start your session with five to ten minutes of movement. You can include: Wrist circles and gentle wrist stretches Cat-Cow movements Plank Downward-Facing Dog Shoulder mobility drills Low lunges Standing leg lifts A gradual warm-up prepares the joints and muscles, for weight-bearing and reduces the temptation to start with repeated attempts. How to do a Yoga Handstand? Learning the Yoga Handstand movement slowly is more helpful than trying to jump into the final pose. Step 1: Begin in Downward-Facing Dog Put hands a shoulder-width apart fingers wide. Press palms hard onto the floor. Make room around shoulders. Look at the floor between hands. Just past them. Step 2: Walk Your Feet Forward Slowly move feet toward hands while keeping shoulders active. When feet move forward hips. Come near the line above shoulders. Aim to bring weight toward hands of using a big kick. Step 3: Create Strong Shoulder Support Press hard into floor of letting shoulders collapse. Picture pushing ground away while keeping arms straight. This gives stability to shoulder area. Step 4: Lift One Leg Lift one leg while keeping pelvis very controlled. Do not swing leg hard. Focus on moving hips toward space above shoulders. Step 5: Practice a Controlled Kick-Up Bend standing leg a little. Use small steady motion to lift other leg up. Yoga Handstands first goal does not have to be a free handstand. Instead learn how much force is needed to move weight onto hands. Step 6: Find Your Balance When both legs are above body tighten thighs and core. Use fingertips and palms to make adjustments. Guide also stresses hands, shoulder stacking, steady leg movement and pulling inner thighs to middle line. Lower, with control of waiting until balance is lost completely. Common Yoga Handstand Mistakes Improvement often comes from understanding what is going wrong. Arching the Lower Back A beginner mistake is creating an excessive backbend while trying to keep the legs overhead. Instead gently engage the core. Think about creating a long line through the body. Looking Too Far Forward Your gaze can affect your balance and body position. Looking forward may encourage the chest and spine to shift. A neutral gaze, toward the floor generally makes it easier to maintain control. Kicking Hard A powerful kick does not automatically create a handstand. Much momentum can cause you to overbalance or fall. Practice a kick and focus on shifting your hips over your shoulders. Collapsing Through the Shoulders Allowing the shoulders to sink can make the position unstable. Press through your hands. Actively elevate your shoulders. Practicing Without a Warm-Up Jumping into repeated kick‑ups can place unnecessary stress on the wrists and shoulders. Preparation should be part of every practice session. These issues are also highlighted in the competitor material particularly skipping warm‑ups, poor wrist‑over‑shoulder positioning, excessive back arching and fear of falling. Yoga Handstand Progressions for Beginners You do not have to begin with a freestanding handstand. Progressions allow you to develop strength and balance gradually. Wall-Assisted Handstand Start with your hands on the floor. Your feet supported by a wall. As your confidence improves, gradually reduce your dependence on the wall. Pike Handstand Preparation Use an elevated surface to create a pike position and practice bringing your hips above your shoulders. One-Leg Lifts From a supported position, experiment with lifting one foot from the wall while keeping the other foot supported. Freestanding Attempts Once you can comfortably control supported variations start practicing freestanding attempts in an open safe area. The progression from assisted pike work to wall-supported practice and reduced assistance is consistent, with the beginner progression described in the supplied competitor material. Yoga Handstand Poses and Variations There is more than one way to practice a handstand. Some beneficial handstand poses and variations are: Wall-supported handstand split-leg handstand tuck handstand straddle handstand straight-leg handstand press handstand preparation These variations should not all be practiced at the same time. Develop the basic power and control, and then advance to more sophisticated techniques. When people search for yoga handstand poses names, they may actually be seeking for distinct variations and entry techniques, rather than completely different poses. Knowing the difference might aid a novice in selecting an appropriate progression. Also Go Through: Hatha yoga for beginners Benefits of Practicing Handstands When you practice a handstand correctly, you can develop physical skills. Upper-Body Strength Supporting yourself on your hands needs your shoulders, arms, wrists and upper body to work hard. Core Stability Keeping your body inverted in a handstand means your trunk stays stable. Your abdominal and back muscles must work together to keep the body in order. Balance and Body Awareness Handstand practice forces you to make tiny adjustments. Over time you will notice balance, weight distribution, alignment and movement. Confidence and Focus Learning a hard balance takes patience. Going through the process can help you concentrate better and feel more comfortable with progress. These benefits are training results, not guaranteed cures. If someone says that a handstand will instantly boost circulation lift mood strengthen bones or fix a problem, you should not take that claim as proven. Inversions may not be safe for everyone. Harvard Health warns that advanced inversions, like handstand practice, should be approached carefully by people who have conditions such as blood pressure. Safety Tips Before Trying a Yoga Handstand Handstands are poses and must be approached with care. Safety: Practice on a stable surface and avoid placing near hard or obstructive objects. Beginners can use a wall for support or practice under the guidance of a yoga teacher. Safety: do not continue through pain, dizziness, unusual pressure or significant discomfort. People with conditions involving blood pressure, heart health, glaucoma or other concerns related to inversions should speak with a healthcare professional before practicing advanced inverted poses. Cleveland Clinic and Harvard Health both advise caution around inversions for people with medical conditions. Safety is more important, than holding the pose for a time. Yoga Pose Standing on Hands: How Long Should You Practice? There is no specific number of minutes required to master the handstand. For beginners short and controlled attempts are generally more useful than exhausting handstand practice with repeated kick-ups. Practice quality attempts, rest and focus on technique. A consistent handstand practice two or three times per week may be more productive than doing a number of unsuccessful attempts in one session. Remember that handstand balance develops gradually. Some handstand practitioners may progress quickly while others may need more time. When Should You Learn a Handstand? A yoga handstand is an advanced skill, so beginners should first develop a foundation in basic yoga movements and upper-body conditioning. You may be better prepared to begin handstand drills when you can comfortably practice movements such as plank and downward-facing dog while maintaining good control. Working with an experienced yoga teacher can also help you understand alignment, choose suitable progressions, and identify when you are ready to move to the next stage. A yoga handstand is a skill, so beginners should first develop a foundation in basic yoga movements and upper-body conditioning. You may be better prepared to begin handstand drills when you can comfortably practice movements such, as planks and downward-facing dogs while maintaining control. Working with a yoga teacher can also help you understand alignment choose suitable progressions and identify when you are ready to move to the next stage. Related Post:- Group yoga poses Final Thoughts Learning a yoga handstand is not simply about getting down. This learning process helps build strength, balance, coordination, mobility and body awareness. Start with preparation before rushing toward the final pose. Warm-up wrists and shoulders to strengthen the core, and practice supported variations. Gradually grow confidence in balance. Interest in a yoga pose standing on hands for practice or the desire to explore advanced yoga training requires patience. Progress is measured not only by how long the handstand can stay upside down but also by how safely and consciously the handstand can enter, hold and exit the position. With practice and proper guidance, the handstand can become a challenging yet rewarding part of a steady yoga practice.
Read article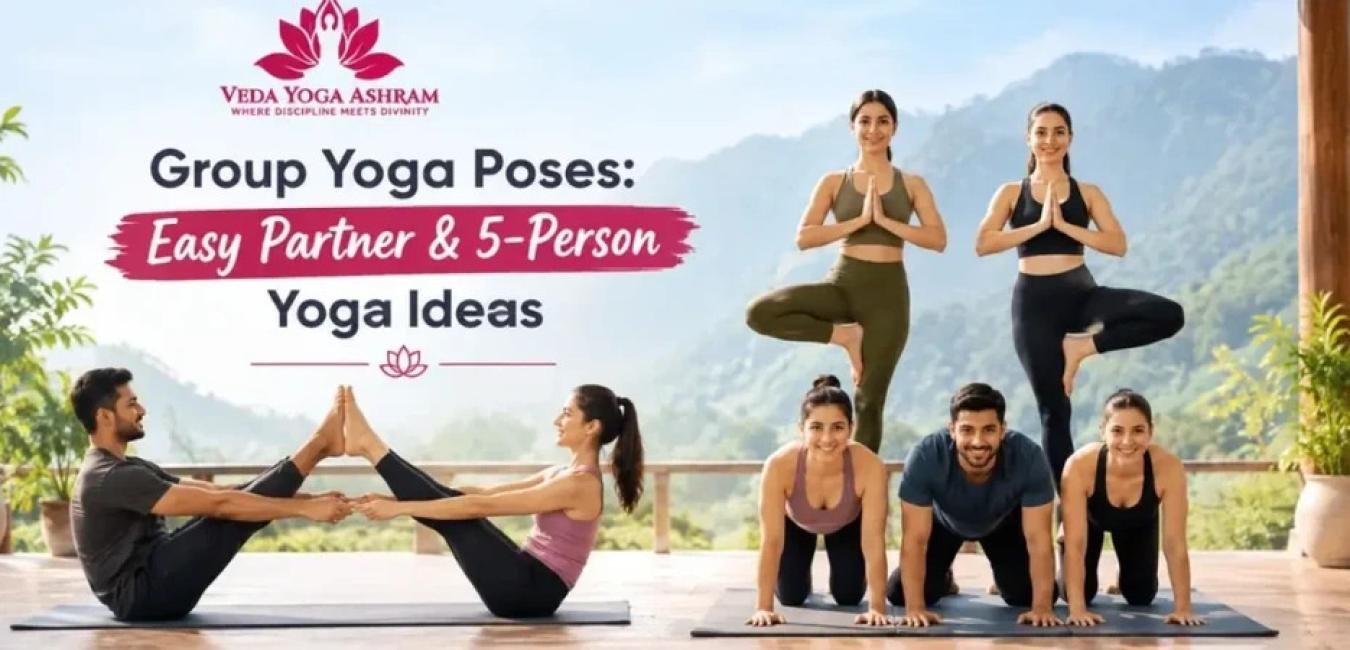
Yoga & Wellness
Group Yoga Poses: Easy Partner & 5-Person Yoga Ideas
Yoga is often done by oneself. Doing a session with friends, family, classmates, or a yoga group can make for a completely different kind of experience. Moving together can help with coordination, communication, and awareness of the body. You can have fun while still letting each person go at their own pace. Group yoga poses that are done in a group can be especially nice for people who are just starting out because they do not require moves or hard balancing. A simple setup, breathing together, and easy motions can be all that is needed to build a feeling of togetherness. This guide is about practices that are good for beginners in a group setting, especially when there are five or more people. It also includes ideas for making the session a comfortable and safe place for everyone. What are Group Yoga Poses? Group yoga means doing yoga poses or movements with others at the same time. Some group yoga activities don’t need any touch. Others might include touches, like hand or fingertip contact. The goal is to bring personal yoga practice and shared movement. People can match their breathing face the way to form a circle or line up their mats in a clear pattern. This is not the same as acro yoga, where one person lifts, supports, or balances another. Group yoga can be gentle and simple for beginners. Everyone stays in control of their body and how far they move. For your session, pick moves that are easy to start, comfortable to hold, and simple to stop. How to Prepare for a Group Yoga Session? Before starting a session, check that there is space for everyone to move freely without running into each other. Each person needs a yoga mat and clothes that make it easy to move around. Items like blocks, blankets, straps or strong chairs can also be there for people who need help. Place the mats carefully so that hands, feet, and heads have space. A circle is really helpful because people can see each other and move in the way. Pick a Gentle Speed The person who is least experienced should never feel like they have to keep up with someone Level of flexibility, balance, or strength. Agree on Easy Ways to Talk One person can lead the changes by counting breaths or letting everyone know when it is time to switch sides. Don’t Force Any Touch Everyone should feel okay with any contact, before holding hands or touching another person. No one should push, pull or try to make someone stretch more. Group Yoga Poses for 5 People Without Lifting When a group of five people gathers simple formations can create an experience without the need for lifts, pyramids or hard partner balances. Everyone should stay responsible for their balance and movement. This makes the session easier to manage when participants have varying experience levels. Five participants can use formations such as: A circle Five mats facing inward. Five mats arranged like spokes. A semicircle Two rows, with one person leading. The formation can change throughout the practice while the actual movements stay simple. 5 Easy Group Yoga Poses If you are looking for group yoga poses for five people these five options offer a way to practice together while letting each person control their own movement. 1. Five-Person Mountain Circle Stand in a circle with space between each person. Start in Mountain Pose with your foot on the ground and your arms by your sides. Take a few breaths together. On a breath slowly lift both arms above your head. Reach up through your fingers while keeping your feet on the floor. Hold for a breaths and then lower your arms together. Why do it: This simple setup helps with working being aware of breathing, good posture and moving as a group. For beginners: If lifting the arms above your head is difficult, keep them at chest height. 2. Group Side Stretch Stay in the circle with your feet a distance apart. Lift one arm over your head. Gently lean to the other side while keeping both feet on the floor. Go back to the middle. Do the same on the other side. Everyone moves at the time but each person has their own space. Why do it: This move helps with group movement. Gently stretches the sides of the body. Important: Do not pull another person’s arm to make the stretch bigger. 3. Five-Person Warrior II Circle Place five mats in a circle with everyone facing a little. Step your feet apart. Turn one foot out. Bend the knee and stretch your arms in opposite directions. Keep your body straight and the back leg active without locking the knee. Hold for a breaths before straightening the front leg and switching sides. Why do it: Warrior II helps build strength in the legs, balance and awareness of the body while letting each person work on their own. Beginner tip: Use a step and a less bent knee. 4. Group Tree Pose Stand in a circle. Start in Mountain Pose. Shift your weight to one foot. Place the foot next to the standing foot with the toes on the floor against the lower leg or higher on the inner thigh when it feels right. Keep your hands at your chest raise them above your head or stretch them out. Hold for a breaths before switching sides. Why it: Tree Pose improves balance and concentration. Important: Do not put the lifted foot directly against the standing knee. 5. Five-Person Cat-Cow Place five mats in a circle. Face the center. Get on your hands and knees with space, between each person. For Cow Pose breathe in. Gently arch your back while lifting your chest. For Cat Pose breathe out. Gently curve your back. Do this slowly for five to eight times. Why do it: This movement helps with moving the spine. Helps everyone breathe together before moving on to harder poses. Modification: If your wrists feel uncomfortable use fists, blocks, forearms or do the movement while sitting. Benefits of Group Yoga Poses Encourages Motivation Practicing yoga alongside others can make it easier for people who find solo exercise repetitive to stay engaged. Develops Coordination Moving together requires attention to timing, breathing, posture, and transitions when practicing yoga. Builds Group Connection Common physical activity facilitates communication, collaboration, and inspiration amongst the members while practicing yoga. Improves Body Awareness Participants need to pay attention not to their position but also to the space around them while practicing yoga. Makes Yoga Enjoyable A relaxed group setting can add variety, playfulness, and a stronger sense of participation in yoga. Research, on group-based activity more broadly suggests that social connection can influence motivation and participation, although the effect differs between individuals when practicing yoga. Safety Tips for Group Yoga Safety becomes especially important when several people share the same practice area. Do not assume that everyone has the same mobility, balance, strength, or experience. Keep Enough Space: Everyone should be able to extend the arms and legs without touching another participant. Do Not Push or Pull: A partner should never force another person's body deeper into a posture. Avoid Weight-Bearing Group Poses: Beginners should avoid lifts, stacked balances, pyramids, and positions where one participant carries another person's weight unless they have specialized instruction. How to Create a Simple 20-Minute Group Yoga Routine? I think a short routine can be enough to introduce beginners to shared movement. 1. Centering – 2 Minutes We. Stand comfortably. We take slow breaths together. 2. Mountain Circle – 3 Minutes We use the opening posture. We establish alignment, breathing and group rhythm. 3. Side Stretch – 3 Minutes We move gently from left, to right. We breathe together. 4. Warrior II – 4 Minutes We practice both sides. We use a stance. 5. Tree Pose – 4 Minutes We hold each side for breaths. We allow participants to use modifications. 6. Cat-Cow – 2 Minutes We finish the sequence with gentle spinal movement. 7. Quiet Rest – 2 Minutes We end in a seated position or Savasana. This structure gives the session direction without making it overly demanding. Group Yoga Poses for Beginners: How to Make Them Easier Beginners do not have to perform the most advanced version of a posture. You can make group yoga poses easier by: Widening or shortening the stance Using a yoga block Sitting on a folded blanket Practicing near a wall Using a sturdy chair Reducing the holding time Keeping the range of movement smaller Everyone in the group does not need to use the same modification. One participant may perform a full Tree Pose while another keeps the toes on the floor. That is completely acceptable. The aim is coordinated practice, not identical physical shapes. Group Yoga vs Partner Yoga Group yoga and partner yoga overlap but group yoga and partner yoga are not exactly the same. Group yoga generally means people practicing together often independently, within a shared formation. Group yoga involves people in the same space each doing their own postures. Partner yoga usually involves two people working together. Partner yoga may include physical contact or mutual support. Both group yoga and partner yoga can be included in a session but beginner groups should introduce cooperation gradually. With five participants independent postures performed in a shared formation are often easier to manage than complicated partner-based techniques. With five participants independent postures are easier to manage than complicated partner-based techniques. Can Children and Older Adults Do Group Yoga? Yes yoga can be adapted for people of ages and for people, with different levels of mobility. Children must have supervision and must not climb on lift or pull other people. Older adults or people who have limited mobility may find chairs shorter ranges of movement and slower transitions useful. Seated versions of Mountain Pose, side stretching, Warrior II and Cat-Cow can make a yoga session easier to follow. The instructor should put safety and personal comfort first than trying to make every participant look exactly the same. How to Choose the Best Group Yoga Poses? The best group pose is not always the one that looks the most impressive. When picking a pose ask: Can everyone get into and out of the position safely? Does every participant control their movement? Is there room between people? Can the posture be modified easily? Does it match the experience level of the group? For people who're new to yoga these questions matter more than choosing a posture just because it looks good in a photo. Related Post:- Hatha Yoga for Beginners Wind-up Group yoga poses can transform a yoga class into a shared experience, even without complex partner moves. With a group of five, circles, lines and spoke‑style formations can build teamwork and togetherness. Each participant can keep responsibility for their movement. The best options are easy to start simple to change, and comfortable to finish. Mountain Pose, Side Stretch, Warrior II Tree Pose and Cat‑Cow are choices for beginners and for mixed‑level groups. At Veda Yoga Ashram yoga can be explored as a practice. It includes postures, breath awareness, meditation, and traditional yogic learning. Whether you practice with friends, family, students, or a community group focus on comfort, communication, and awareness. The best shared practice is one where everyone can participate safely and enjoy moving and breathing together.
Read article
Yoga & Wellness
Hatha Yoga for Beginners: A Complete Guide to Poses, Practice & Teaching
Beginning yoga can feel a bit scary because there are many styles and traditions. Hatha yoga for beginners is often a first step. It lets people slow down learn postures, match movement with breathing and feel more aware of the body. Hatha Yoga is not a set of stretches. Traditional Hatha Yoga has practices like asana, pranayama, mudra, bandha and cleansing techniques. The goal is to ready the body and mind, for yogic work. The Hatha Yoga Pradipika, written by Svātmārāma in the century is a key classical text. It covers asana, pranayama, mudra, bandha, cleansing practices and samadhi. If you are starting Hatha yoga the important thing is not how advanced a pose looks. It is learning to practice breathe easily understand alignment and honor the bodys limits. What Is Hatha Yoga? Hatha Yoga is a traditional system that focuses on practices that move the body control the breath and calm the mind. In today’s yoga studios the word Hatha often means classes that go slow start with poses breathe in a calm way and give space to check alignment. This modern meaning is smaller than the old one. Classical Hatha Yoga texts explain Hatha Yoga as a path that mixes body work and energy work to get the student ready, for deeper meditation. The Hatha Yoga Pradipika shows Hatha Yoga as a step that leads to Raja Yoga, not a set of physical postures. The common story that ha means sun and tha means moon is often used in yoga classes to talk about balance.. It is better seen as a traditional story, not a strict dictionary meaning. Hatha Yoga Beginner Practice For a Hatha Yoga beginner it is best to start with a few foundational postures instead of attempting to learn dozens of asanas at the same time. A basic Hatha Yoga practice may include standing poses, gentle spinal movements, seated postures, simple pranayama and relaxation. Holding a Hatha Yoga posture for breaths gives a Hatha Yoga beginner time to understand alignment and notice how the body feels. Hatha Yoga is also useful for learning how movement and breath connect. A 10-session beginner-level Hatha Yoga intervention in a controlled study was linked to flexibility, balance and core strength, among the participants but one study does not prove the same for everyone. Principles of Hatha Yoga A beginner benefits from understanding the principles behind the practice of treating Yoga as a simple exercise routine. 1. Balance of Body, Breath and Mind The physical posture is one part of the practice. Attention to breathing and awareness of sensations can make an asana more mindful. Than forcing the body into a particular shape Hatha Yoga encourages controlled practice and steadiness. 2. Conscious and Steady Practice Consistency is more useful than performing an extremely difficult session. A beginner may practice for 15–30 minutes times each week and gradually develop greater familiarity with the postures, breathing and transitions. 3. Preparation for Meditation Traditional Hatha Yoga does not end with fitness. Its practices are intended to prepare the practitioner for forms of yogic practice and meditation. This is why a traditional session may include more, than Hatha Yoga poses. Breathing, concentration, relaxation, mudras and other practices can all have a place depending on the lineage and teacher. Benefits of Hatha Yoga for Beginners I believe that the possible benefits of Hatha Yoga depend on the style, intensity, frequency and the individual practitioner. Research on yoga broadly suggests that Hatha Yoga may help with stress management, sleep, balance, mental well‑being, flexibility and physical function. 1. Physical Benefits Regular Hatha Yoga practice can help develop flexibility, balance, muscular strength and body awareness.. Weight‑bearing postures challenge stability while stretching postures can support mobility when practiced appropriately. I have seen a beginner‑level study that found that Hatha Yoga improved flexibility, balance and core strength after a series of sessions. 2. Mental and Emotional Benefits The slower pace and attention to breathing can make Hatha Yoga a useful part of a stress‑management routine. NCCIH reports that research suggests Hatha Yoga may support stress management and mental and emotional well‑being. However Hatha Yoga should not be presented as a guaranteed treatment for anxiety, depression or any medical condition. Hatha Yoga can be a wellness practice but people with significant symptoms should seek appropriate professional care. 3. Better Body Awareness Better Body Awareness Hatha Yoga gives you time to notice how your feet, knees, hips, spine, shoulders and breath respond, to postures. This awareness can help you recognize tension and make sensible adjustments rather than automatically pushing deeper. Essential Hatha Yoga Poses for Beginners There is no list of the best beginner poses. The correct choice of beginner poses depends on mobility, experience, health and the purpose of the class. Hatha Yoga For Beginners These foundational Hatha Yoga poses are often useful for someone starting a practice. Mountain Pose (Tadasana) Mountain Pose shows the ideas of standing alignment. Stand with your feet on the floor stretch the crown of the head relax the shoulders and let the arms rest beside the body. Tadasana may seem easy. It teaches beginner poses to spread weight evenly and become aware of posture. Childs Pose (Balasana) Childs Pose is a posture that can give a comfortable break during practice. Kneel, sit on your heels. Gently fold the torso forward. The knees may be together or apart depending on comfort. Use a cushion. Bolster beneath the torso or head when extra support is needed. Cat-Cow Pose (Marjaryasana-Bitilasana) Cat-Cow introduces gentle movement through the spine and helps beginners coordinate movement with breathing in beginner poses. Begin on hands and knees. Move between a rounded spine and a gently extended spine while keeping breathing slow and controlled. Avoid forcing the neck or lower back into positions. Facing Dog (Adho Mukha Svanasana) Downward-Facing Dog is a familiar yoga posture that combines stretching and weight-bearing. From hands and knees lift the hips upward. Back while keeping the spine long. Beginner poses do not need to straighten the legs or force the heels toward the floor. Bending the knees can actually make it easier to maintain length. Warrior I (Virabhadrasana I) Warrior I introduces strength, balance and coordinated movement. Step one foot back bend the knee comfortably ground the back foot and raise the arms while keeping the torso stable. Keep the knee tracking in the same direction as the foot and avoid forcing the hips into a perfectly square position if your anatomy does not allow it comfortably. Warrior II (Virabhadrasana II) Warrior II develops standing stability and encourages awareness of the legs, pelvis, shoulders and gaze. Spread the feet apart turn one foot outward bend the knee and extend the arms in opposite directions. Keep the knee controlled rather than allowing it to collapse inward. Cobra Pose (Bhujangasana) Cobra Pose can be introduced as a back-extension practice. Lie on your abdomen with the hands near the ribs. Gradually lift the chest using the back muscles while keeping the movement comfortable. There is no need to lift high. A smaller movement can be more appropriate for beginner poses. Seated Forward Bend (Paschimottanasana) This seated posture stretches the back of the body. Sit with the legs extended and hinge forward from the hips without forcing the hands to reach the feet. Beginner poses with hamstrings can keep the knees slightly bent or use a strap around the feet. Bound Angle Pose (Baddha Konasana) Bring the soles of the feet together and allow the knees to move outward naturally. This pose can be useful, for exploring hip mobility and seated posture. Do not press the knees toward the floor. Support them with cushions when necessary. Corpse Pose (Savasana) Savasana is usually practiced toward the end of a yoga session. Lie on your back allow the legs and arms to relax and breathe naturally. Although it appears simple consciously relaxing the body can be a part of learning how to transition from active practice into stillness. Basic Pranayama Techniques for Beginners Breathing is a part of beginning Hatha yoga. A beginner should first feel comfortable with natural nasal Breathing before trying breath retention or forceful techniques. Diaphragmatic Breathing Lie comfortably and watch the movement of the abdomen during Breathing. Of exaggerating the Breathing allow the inhalation and exhalation to stay smooth and relaxed. Ujjayi Breathing Ujjayi is a controlled Breathing method that is traditionally practiced by narrowing the back of the throat. It can be introduced gradually with the emphasis on Breathing rather than producing a loud sound. Nadi Shodhana Alternate Nostril Breathing, commonly called Nadi Shodhana uses alternating nostrils during the Breathing cycle. Beginners should first learn the technique without unnecessary Breath retention. Advanced variations are best learned from a qualified teacher. People, with health conditions should discuss Breathing practices with a healthcare professional and instructor before attempting demanding techniques. How to Start Hatha Yoga as a Beginner? Starting Hatha yoga for beginners does not need a routine. Find a place to practice a good mat and maybe some extra items, like blocks, straps, blankets or bolsters. A short 25 to 30 minute practice might go like this: Two or three minutes of breathing Cat-Cow to move the spine gently Tadasana Warrior I Warrior II Downward-Facing Dog Childs Pose Cobra Pose Baddha Konasana Two to five minutes of Savasana The order can change depending on how you feel and what your body needs. WHO says yoga is a way to help with activity and general health and current WHO advice also talks about how yoga can help with strength, flexibility, movement and mental health. How Often Should a Beginner Practice Hatha Yoga? Consistency is very important. It is better to focus on being regular than to try to do sessions all the time. A new person can begin with two or three sessions every week. Then they can slowly increase how often they practice as their body gets used to the movements. Some people like to do sessions every day. Others find it better to attend classes a few times each week. The important thing is to keep going. A routine that you can stick to without feeling tired or in pain is better, than a schedule that makes you feel bad. Common Mistakes to Avoid for Hatha Yoga New students often make the mistakes when learning yoga. Forcing Flexibility: Do not use pain as a measure of progress. Flexibility develops differently from person to person. Ignoring Alignment: Small alignment adjustments can make a posture more comfortable and stable. Holding the Breath: Breathing should remain steady unless a specific breathing technique calls for a controlled variation. Comparing Yourself With Others: Yoga is not a competition. Differences, in anatomy, mobility, age, strength and experience mean that two people may perform the posture differently. Skipping Relaxation: A complete class does not need to be a series of challenging poses. Relaxation provides an opportunity to settle after practice. Is Hatha Yoga Safe for Beginners? For people yoga is generally considered a safe form of physical activity when practiced properly but injuries can occur. The National Center for Complementary and Integrative Health or NCCIH identifies sprains and strains among the common yoga-related injuries. They recommend learning yoga with an instructor especially for new practitioners. Beginners should be especially careful, with positions, inversions and forceful breathing. People who are pregnant, older recovering from an injury or living with a health condition may need modifications. It is important to listen to your body and make changes as needed. Pain, dizziness or unusual shortness of breath is not something to ignore. Stop the practice. Seek appropriate advice when necessary. Your safety is the important thing. Teaching Hatha Yoga: What Should Beginners Learn? Someone who wants to teach Hatha Yoga needs to understand more than a list of postures. A responsible teacher should understand: Yoga Anatomy and Alignment: Teachers need to recognize movement patterns, common alignment problems and suitable modifications. Sequencing: A class should have a progression starting with warm‑up and moving slowly to more challenging postures before ending with relaxation. Pranayama and Meditation: Teaching Hatha Yoga can involve more than asana. A teacher should know how to introduce breathing and meditation practices that fit the student’s level. Student Safety: Teachers must see when an exercise needs to be changed avoided or sent to a health professional. Communication Skills: A good teacher explains movements clearly shows them watches students closely and gives respectful corrections. Teaching Different Levels: A beginner class may need different instructions than an advanced session. New teachers should learn how to give variations instead of asking every student to do the same shape. For anyone who wants to become a yoga teacher structured teacher training can give a fuller foundation than learning poses alone from online videos. Hatha Yoga vs Other Yoga Styles Beginners often wonder if Hatha Yoga is better than Vinyasa or Ashtanga or other styles. There is no one-size-fits-all answer. Modern classes labeled as Hatha are usually slower and focus more on poses and alignment. Vinyasa tends to move quickly linking breath with movement in a flowing way. Ashtanga has a fixed sequence. Can be more intense physically. A review by professionals says Hatha classes often include simple slow movements. They can be a fit, for beginners who want to build strength improve flexibility and learn proper form. The best yoga style is the one that fits your goals your body’s needs, what you enjoy and where you can get good guidance. When Should You Learn Hatha Yoga From a Teacher? You can learn poses from trusted educational resources but working with a teacher is especially helpful when you are brand new have trouble seeing alignment or want to learn breathing techniques and old practices. A teacher can guide you through each pose. Make sure you do it safely. A qualified teacher can watch how you move and change the exercises so they fit your level. The teacher’s eye on your form helps you avoid mistakes and build confidence. This is also important, for students who want to move from beginner hatha yoga practice to teaching. In a teacher training setting the teacher shows you how to study anatomy, how to put poses together how to demonstrate them how to communicate clearly and the ideas that lie behind every yoga practice Read Post:- 100 Hour Yoga Teacher Training Course in Rishikesh Final Words Hatha yoga for beginners is not about mastering postures as quickly as possible. It is about building a foundation through movement, breathing, awareness and consistent practice. Start with Hatha Yoga poses. Learn how to align your body. Give yourself time to understand each posture. Add breathing practices slowly. Use relaxation to finish your sessions. Hatha Yoga also offers a lesson for anyone thinking about a future in yoga education. Teaching requires more, than knowing the names of asanas. It requires understanding alignment, anatomy, sequencing, breathing, communication, modifications and student safety. For beginners a patient and consistent approach is the way to build confidence.. For those who want to go beyond personal practice a structured yoga teacher-training program can provide the deeper knowledge needed to understand and eventually teach Hatha Yoga responsibly.
Read articlePlan Your Journey
How To Reach Us
Veda Yoga Ashram is nestled in the lap of nature, the Himalayas to its back while the Ganga meanders at its front. The place is well connected to the nearest cities by roadways, airways, and railways, assuring you a comfortable and hassle-free journey to the course.
By Airways
The nearest airport is Jolly Grant Airport, Dehradun, which is well-connected to all metro cities. You can also reach Rishikesh via Dehradun airport and you can hire a taxi from the airport or you can ask our coordinators to help you with one.
By Roadways
The city is well-connected to all neighboring cities by road. You can hire a taxi or board a bus from the nearest cities like Delhi, Haridwar, and Dehradun. The roads are in good condition, and a number of taxis are available on hire.
By Railways
The nearest railway stations are Haridwar and Rishikesh. Haridwar Railway Station is well-connected to most Indian cities and has regular local train services. You could reach Veda Yoga Ashram by hiring a taxi from the station.